The latest from the PostHog community

    How to add session replays to Zendesk

    Feb 08, 2024

    Session replays can be a useful support tool for debugging and recreating issues. The errors, console, and network data along with the rest of PostHog's tools make PostHog a powerful support platform.

    To get easy access to session replays in Zendesk, you can link to them when users submit tickets. To show you how to do this, we build a basic Next.js app with a form, add PostHog, connect the form to Zendesk, and setup the session replay link in the submitted ticket.

    1. Create a basic Next.js app with a form

    First, make sure Node is installed (18.17 or newer), and then create a Next.js app:

    Terminal
    npx create-next-app@latest zendesk-sessions

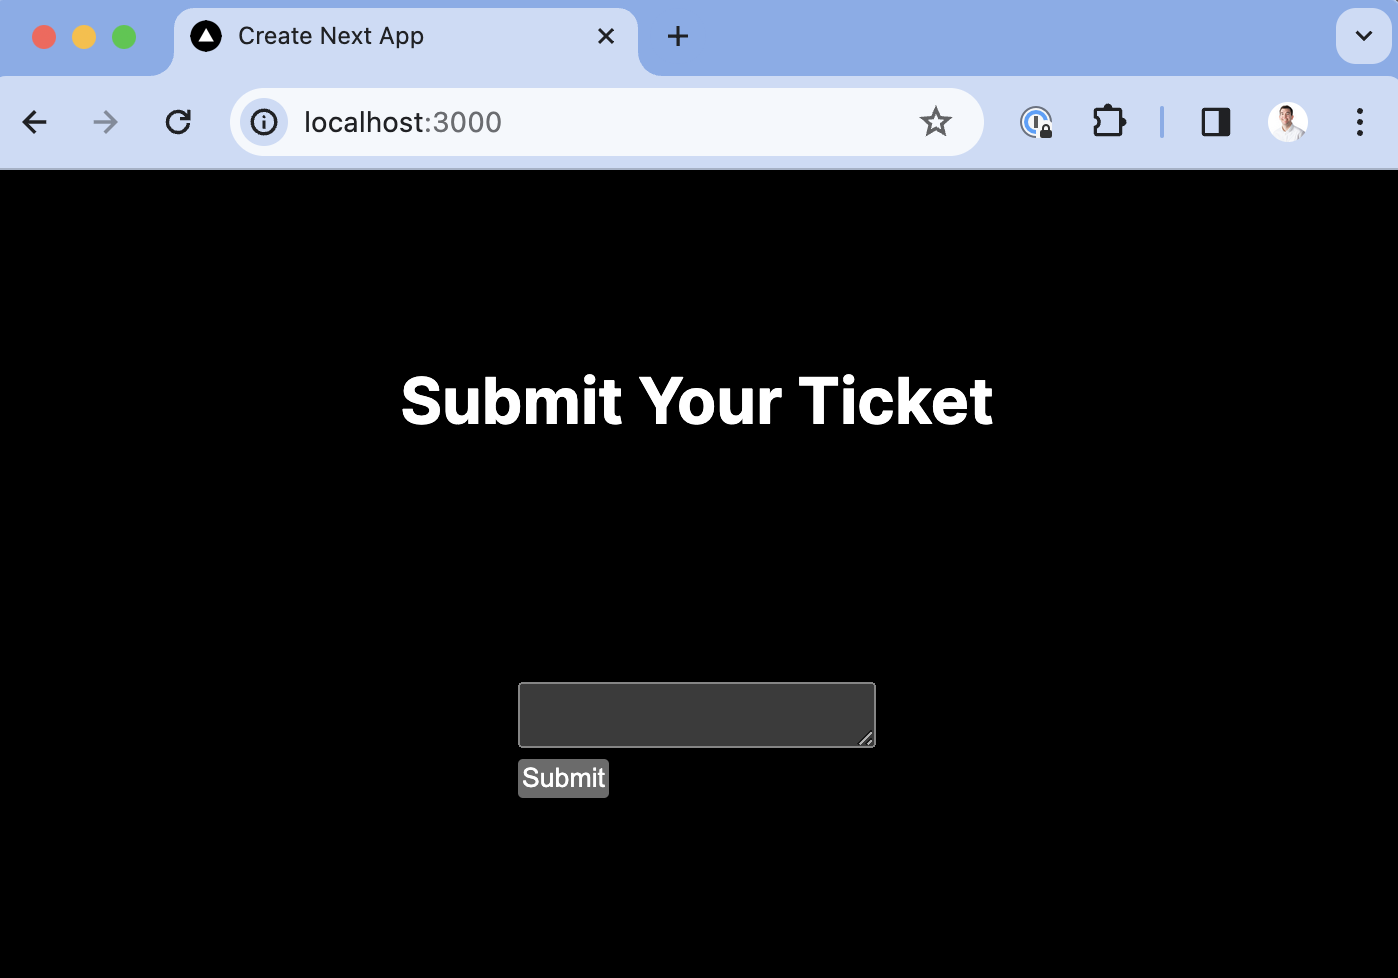
    Select No for TypeScript, Yes for use app router, and the defaults for every other option. Once created, go into your app/page.js file and set up a basic form for users to submit.

    JavaScript
    // app/page.js
    "use client"
    import { useState } from 'react';
    import styles from "./page.module.css";
    export default function Home() {
    const [content, setContent] = useState('');
    const handleSubmit = async (e) => {
    e.preventDefault();
    }
    return (
    <main className={styles.main}>
    <h1>Submit Your Ticket</h1>
    <form onSubmit={handleSubmit}>
    <textarea
    value={content}
    onChange={(e) => setContent(e.target.value)}
    />
    <br />
    <button type="submit">Submit</button>
    </form>
    </main>
    );
    }

    Once done, run npm run dev and go http://localhost:3000 to see your app.

    Next.js app

    2. Add PostHog

    To set up session replays, we need to install PostHog in our app. If you don't have a PostHog instance, you can sign up for free.

    Important: Make sure to enable "Record user sessions" in your project settings.

    After doing this, install the posthog-js SDK:

    Terminal
    npm i posthog-js

    Next, create a providers.js file in your app folder. In it, initialize PostHog with your project API key and instance address and export a provider component. If you have a US Cloud instance, also make sure your ui_host config option is set to https://us.posthog.com.

    JavaScript
    // app/providers.js
    'use client'
    import posthog from 'posthog-js'
    import { PostHogProvider } from 'posthog-js/react'
    if (typeof window !== 'undefined') {
    posthog.init('<ph_project_api_key>', {
    api_host: '<ph_instance_address>',
    ui_host: 'https://us.posthog.com' // remove if EU
    })
    }
    export function PHProvider({ children }) {
    return <PostHogProvider client={posthog}>{children}</PostHogProvider>
    }

    Once created, you can import PHProvider into your layout.js file and wrap your app in it:

    layout.js
    import "./globals.css";
    import { PHProvider } from './providers'
    export default function RootLayout({ children }) {
    return (
    <html lang="en">
    <PHProvider>
    <body>{children}</body>
    </PHProvider>
    </html>
    );
    }

    3. Connect the form to Zendesk

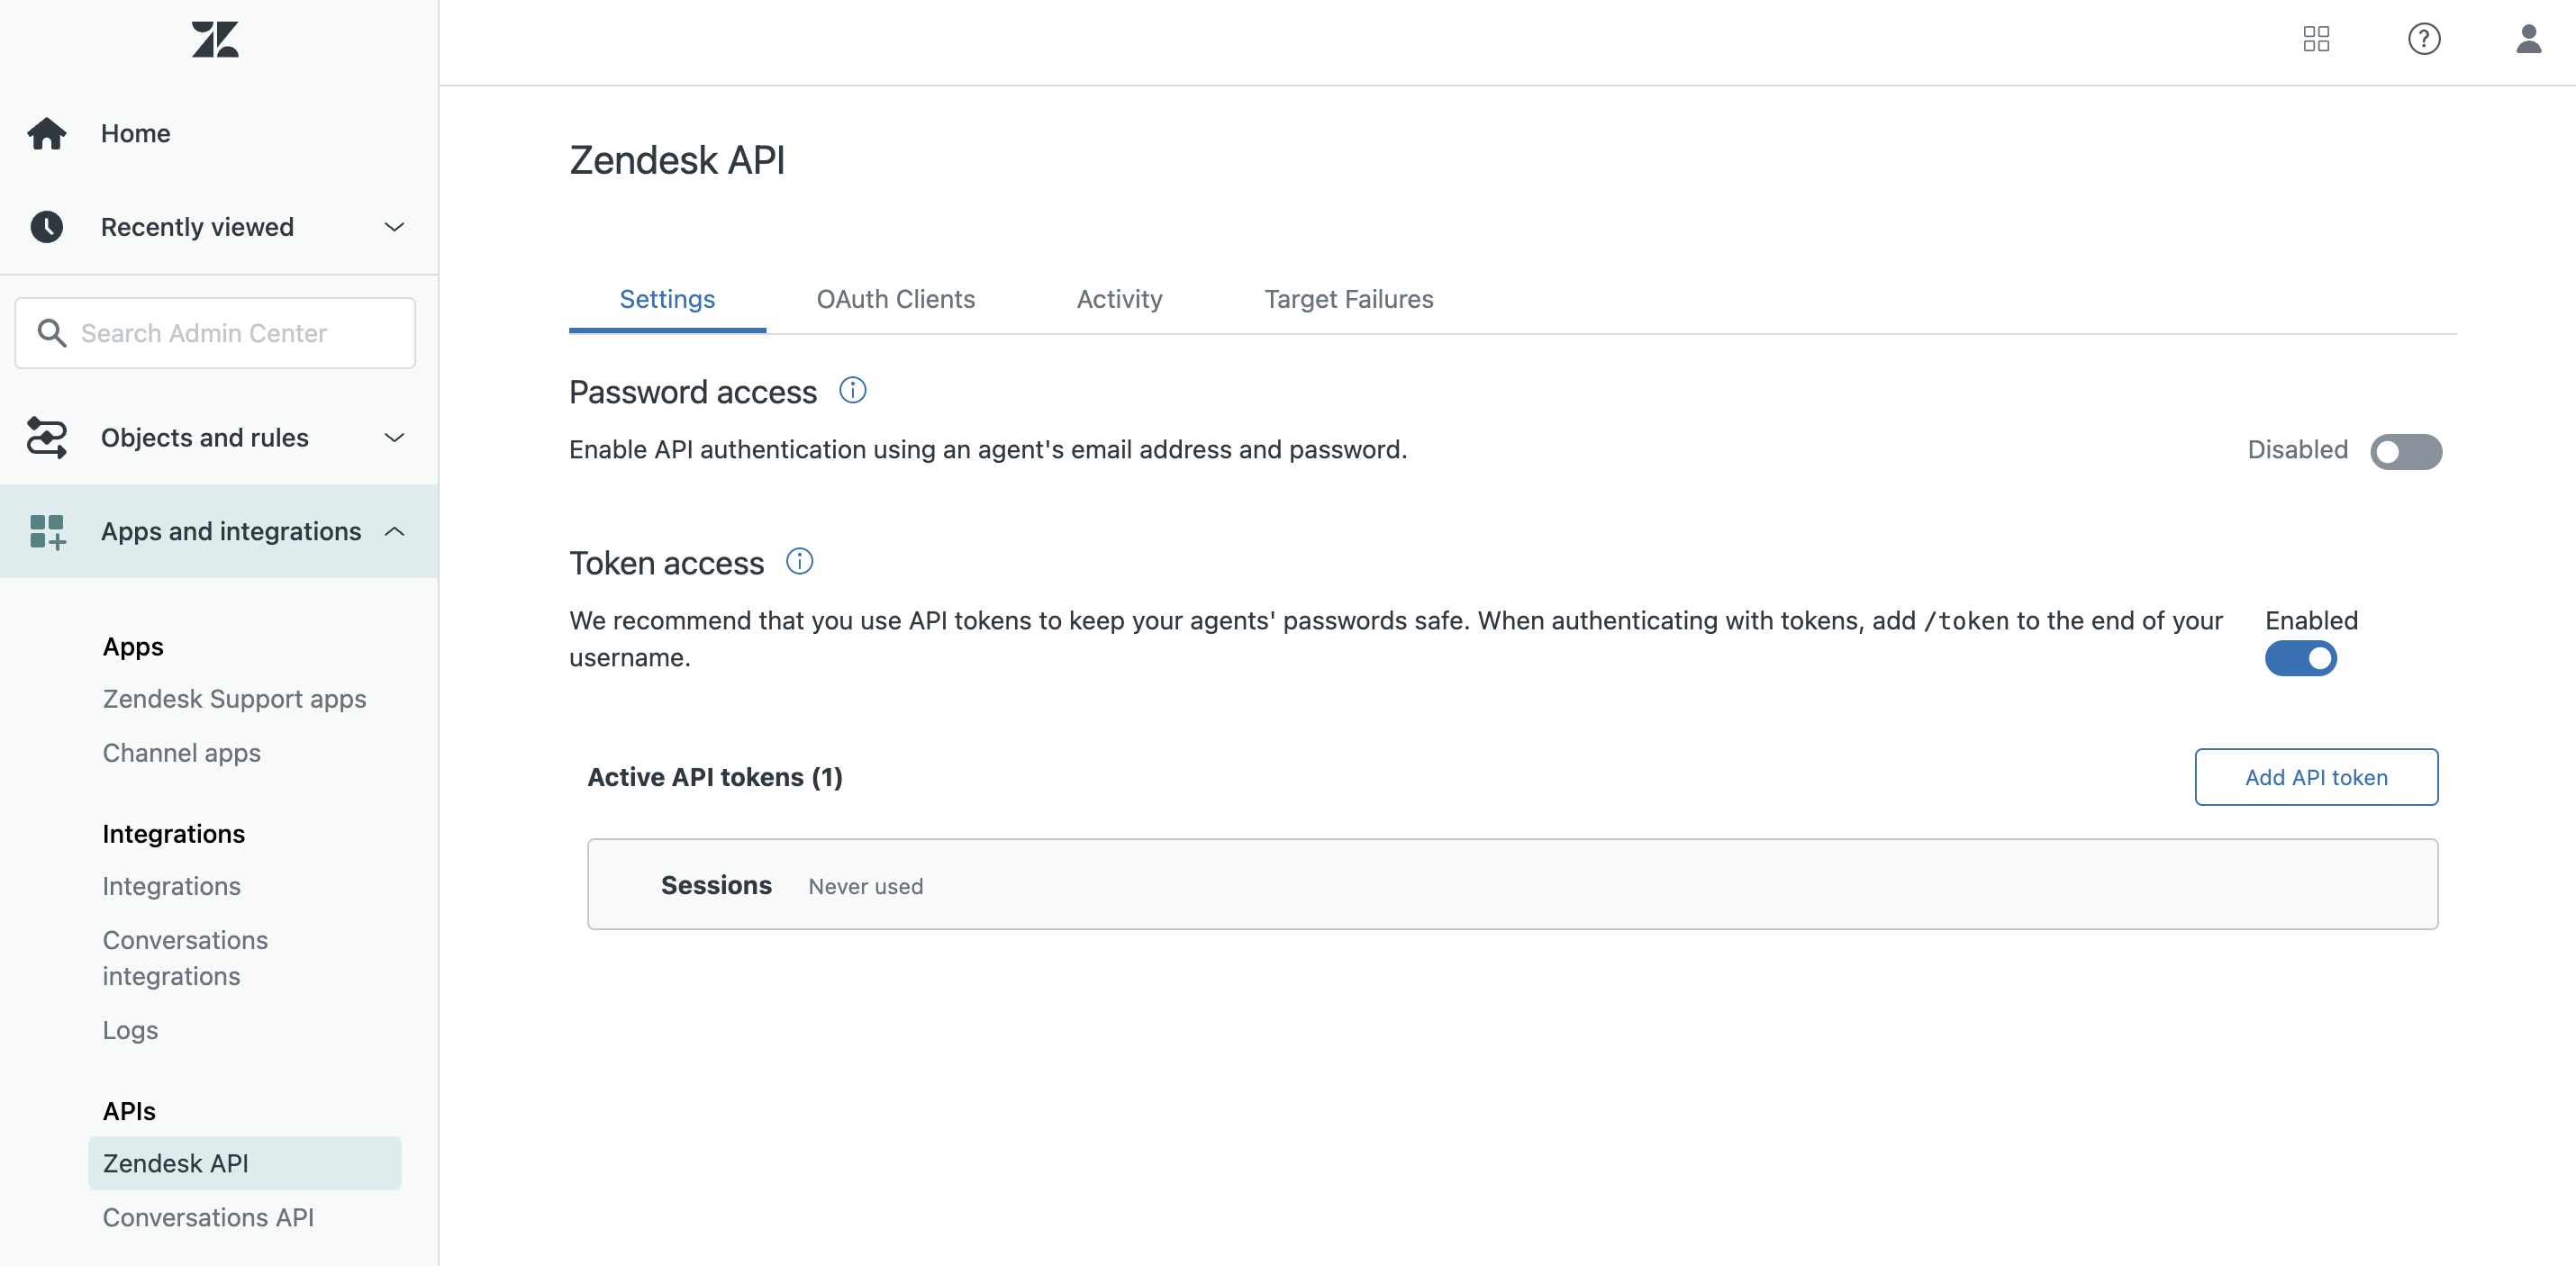
    Connecting the form to Zendesk requires you to have access to your admin center at your-subdomain.zendesk.com/admin/home. Once here, click "Apps and integrations" in the sidebar and then select "Zendesk API." Enable token access, add a new API token, copy its value, and head back to your app.

    API key

    In app/pages.js, we set up a server-side function to submit a ticket to Zendesk. In it, we set up a POST request with a subject, body content, requester, and authorization. Ideally, you would have their real name and email, but we will use my own as a placeholder for now.

    JavaScript
    // app/page.js
    // ... your existing code
    async function submitTicket(content) {
    const user = 'ian@posthog.com'
    const pwd = 'mUndDjKGW3Qu1jPqTKsw1k7hDtLUALswwQlggK27'
    const url = 'https://your-subdomain.zendesk.com'
    const res = await fetch(`${url}/api/v2/requests.json`, {
    method: 'POST',
    headers: {
    'Content-Type': 'application/json',
    },
    body: JSON.stringify(
    {
    request: {
    subject: 'New Ticket',
    comment: { body: content },
    requester: {
    name: 'Test User',
    email: 'ian@posthog.com'
    }
    }}
    ),
    auth: {
    username: user,
    password: pwd
    }
    })
    console.log(res);
    }

    After adding this, we have handleSubmit trigger it with the content like this:

    JavaScript
    "use client"
    import { useState } from 'react';
    import styles from "./page.module.css";
    export default function Home() {
    const [content, setContent] = useState('');
    const handleSubmit = async (e) => {
    e.preventDefault();
    await submitTicket(content);
    }
    return (
    <main className={styles.main}>
    <h1>Submit Your Ticket</h1>
    <form onSubmit={handleSubmit}>
    <textarea
    value={content}
    onChange={(e) => setContent(e.target.value)}
    />
    <br />
    <button type="submit">Submit</button>
    </form>
    </main>
    );
    }
    async function submitTicket(content) {
    //... rest of your code

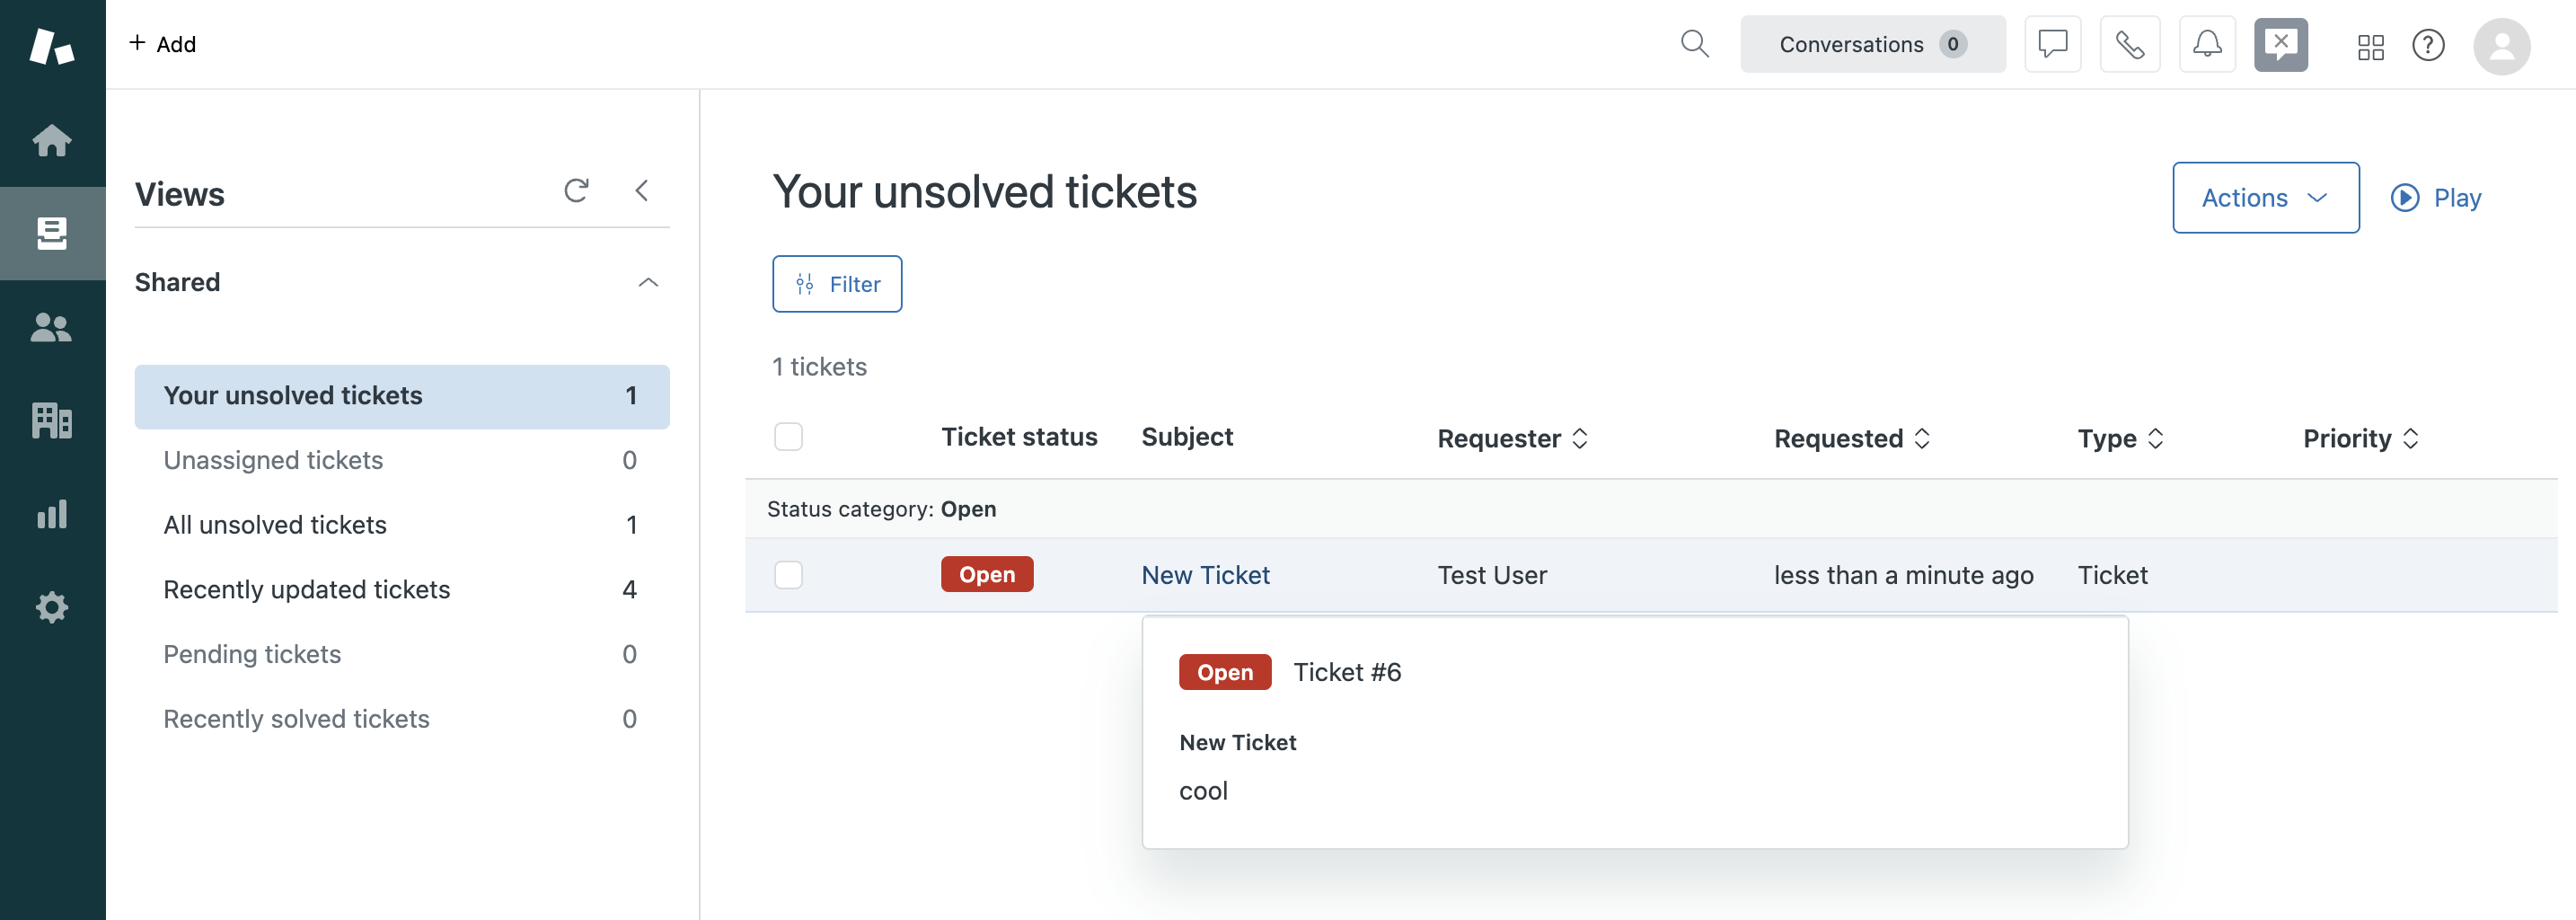
    Now when we go to our app and submit a value, it creates a ticket in Zendesk.

    Ticket in Zendesk

    The final piece is including a link to the session replay in the ticket. The JavaScript SDK makes this easy with the get_session_replay_url() method. We just add PostHog and then modify the content value we pass to submitTicket .

    JavaScript
    "use client"
    import { useState } from 'react';
    import styles from "./page.module.css";
    import { usePostHog } from 'posthog-js/react'
    export default function Home() {
    const [content, setContent] = useState('');
    const posthog = usePostHog();
    const handleSubmit = async (e) => {
    e.preventDefault();
    console.log(posthog.get_session_replay_url())
    const finalContent = `
    ${content}\n\n
    Session Replay: ${posthog.get_session_replay_url()}
    `
    await submitTicket(finalContent);
    }
    // ... rest of your code

    Now, when you check your ticket in Zendesk, you'll see a session replay link to watch the replay in PostHog.

    Bonus: Beyond a session replay link, you can customize the content for the ticket with information like:

    • User ID
    • Report event ID
    • Admin links
    • Target area

    As an example, you can see what we do in GitHub.

    Further reading